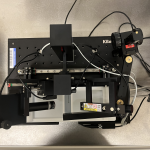
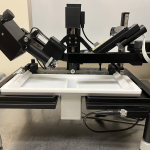
The transfer configuration is what the trough will most often be in. This is how we actually coat a chip in the polymer. The BAM is useful for understanding what is happening on the surface and seeing how it behaves, esp. during polymerization.
The sensor may need to be recalibrated after changing configurations. You should always do a deep clean after changing configurations as there will be significant time where the trough is exposed to the open air.
To change between the two configurations follow these instructions below:
Transfer Configuration to BAM Configuration:
- Remove the trough covering (the large black box).
- Remove USB-C connector to the dipper arm motor, thread through the hole.
- Remove vacuum tube from dipper arm, thread through the hole.
- Remove the dipper arm by unscrewing the bolt on the underside of the trough.
- Remove the UV light fixture via hand unscrewing, you may need a hexagonal screwdriver to loosen the connections. One of these is available in the benchtop in the main lab.
- Angle the pressure sensor away from the trough, be gentle with this object. Set aside the physical platinum sensor so that it is not lost/damaged.
- Remove the BAM from the pelican case, it is stored in the storage closet CB 315.
- Place the BAM on the device, securely screw the microscope to the platform from the underside.
- Retrieve the appropriate USB-C connectors, you will need 3 in total. Connect the angle motor (top connector), height motor (back bottom-right connector), and focus motor (middle left connector, see BAMware manual). Thread the angle and height cables through the back right opening, thread the focus cable through the back left opening.
- The camera cable is pre-attached, thread through the back left opening.
- The laser cable is partially attached, thread the laser connector through the back right opening and attach to the laser lock on the front right of the platform. Note that the connector lines up with the port, it will only connect in 1 orientation.
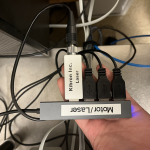
- Finally, connect all 3 USB-C ports to a USB hub, also connect the laser to this hub by connecting the cable after the laser lock (connected in step 11) to the laser-USB adapter. Again this only works in one orientation.
- Connect the USB hub to the leftmost USB port (or otherwise labeled) on the front of the machine.
- Finally, connect the camera USB cable to a USB 3.0 port located on the back of the machine (it’s an internal PCIe hub so it is found at the back of the PC at the very bottom)
- Launch the BAMware software from the computer to determine if everything is being detected properly.
- For use of BAMware see this page.
- Your setup should look something like this.
- If possible/needed, reattach the UV Light fixture so that polymerization can be done automatically without user exposure to UV light.
- Replace the covering.
- Remove any tape covering the lens/laser before use.
Note that optionally the trough can be replaced with a flat microscopy trough, we have not currently tried this but it is available to us.
WARNING:
The BAM contains a 532nm green Class 3B laser for operation. During normal operation this beam is entirely contained within the trough housing, but for an abundance of caution users should wear protective eyewear (OD 6+ at 532 nm) during operation of this instrument. Avoid opening the instrument while the laser is on, (indicated by a red LASER ON in the BAM software). The software should automatically turn the beam off if the housing is opened, but it is recommended to turn it off manually beforehand if the housing needs to be opened.
BAM Configuration to Transfer Configuration:
- Disconnect all of the USB-C connections from the USB hub and thread back through the trough to remove.
- Disconnect any other connections and thread all the cables through the openings in the back of the platform to remove (from outside the trough to in the trough, most cables don’t fit the other way).
- Remove the USB-C connections from the motors, set aside the cables.
- If you reattached the UV light fixture, remove that now.
- Remove the BAM by unscrewing the connection and the bottom of the height tower.
- Cover the lens/laser with tape before storage.
- Store BAM in the pelican case.
- Install the height tower for the dipper arm, connect the USB-C port to the computer (any port is fine)
- Connect the vacuum tube to the top of the dipper.
- Reattach the UV light fixture.
- Your setup should look something like this. (No images at the moment, trough is currently in BAM configuration)
- Replace the covering.


