First ensure that the BAM is properly installed according to the instructions here.
Instructions on how to use certain features of the software as well as a manual can be found here.
Operation of the Motors
The height, focus, and angle motors of the camera can be adjusted so that the image is as desired. Each of these can be adjusted via the software under the Motor Ctrl tab:
- Height – The height will need to be adjusted in most experiments based on the water level of the trough at the time. Between 26 and 28 mm seems to work best, but the height should be adjusted so that the laser pattern is visible in the center of screen.
- Focus – The focus will also need to be adjusted in most experiments also based on water level. Around 14 mm works well, but ensure that as much of the image is in focus as possible. It may be difficult to focus on the surface until monomer has entered the field of view, simply wait. The laser pattern is NOT an adequate reference to focus onto.
- Angle – The angle should not need to be adjusted frequently. The software has a feature in the Auto Tune tab that will automatically locate the Brewster angle for the surface. The Brewster angle for water is 53°, the angle should be close to this value and only need minor deviations for visual improvement. Try to stay within 52.5-53.5°.
Physical Adjustments
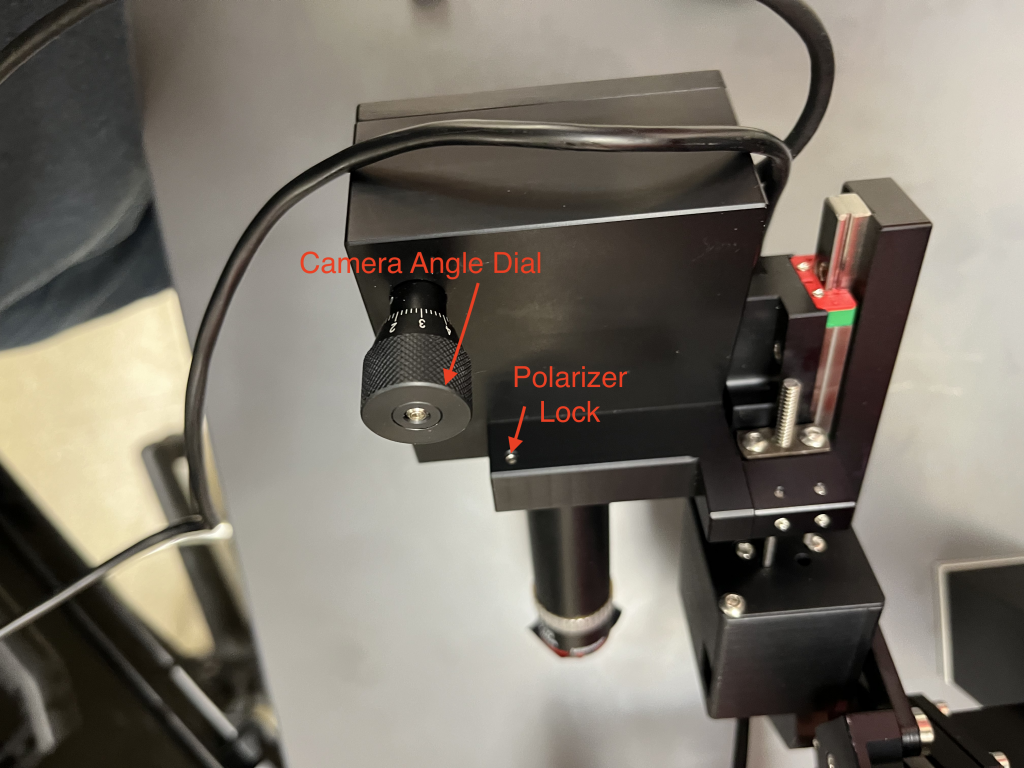
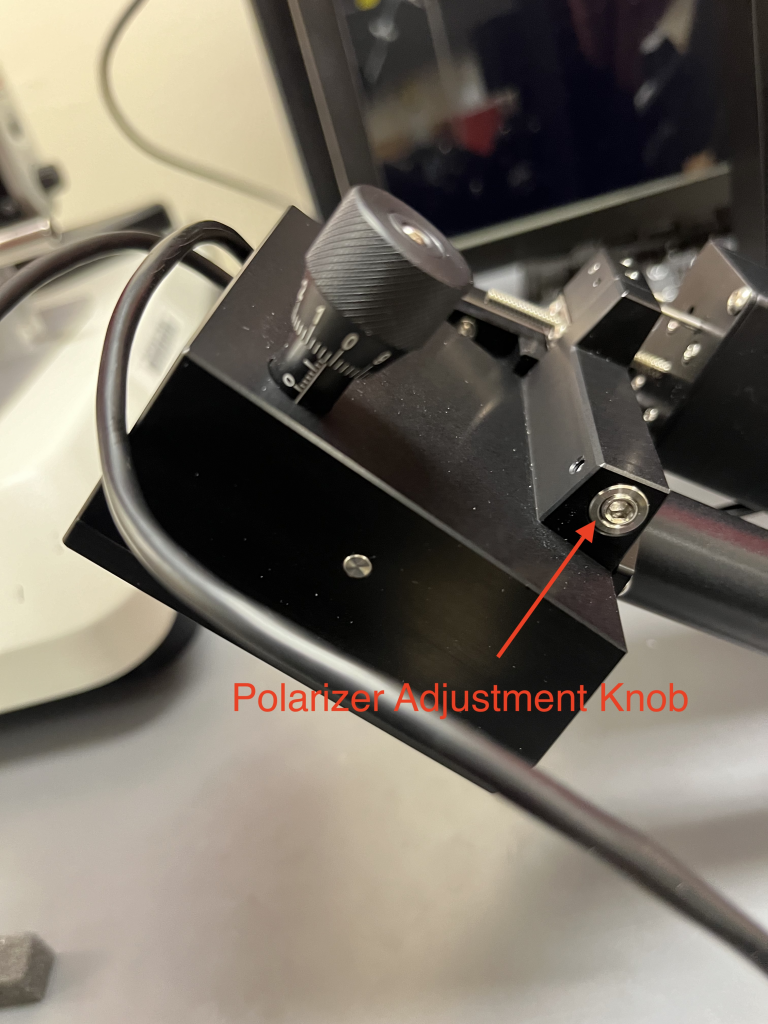
There are two additional parameters that can be adjusted on the BAM to improve visual clarity. Both are located physically on the camera and must be adjusted manually. Pictures of each as they appear on the instrument are included below.


The camera angle dial can be used to adjust the size of the horizontal band that is in focus by the image. A value of about 5.7 mm is what is recommended by the software, but minor adjustments may be necessary if it the top or bottom of the image has a horizontal band that appears to be out of focus.
The polarizer is a bit more difficult to adjust. First the polarizer lock must unlocked, this can be done with a small hex screwdriver head (there is at least one tool in the SLH lab with the right size for this). After the polarizer is unlocked, the actual adjustment knob can be adjusted using a larger hex screwdriver. The knob can be turned clockwise or counterclockwise as needed, though it does circle back on itself.
Adjustments to these knobs should be done while there is something with clear contrast on the surface of the water, e.g. fractured monolayer. Note that opening the trough to adjust these controls will turn off the laser while the container is open. Therefore you cannot adjust the visual while actively looking at it, instead trial and error must be utilized.
Recording Visual Data (Video/Images)
The primary form of data obtained from the BAM is visual information about the generated monolayer. Therefore it is important to know how to use the software to obtain it.
- Both video and images can be recorded under the sampling tab. Image files should be taken with the Include Axes box ticked to have an accurate scale bar. To record still images simply click on the Snap button. The program may appear to freeze for a few seconds, but the image will be saved to the location specified by the Save to… button below the Include Axes box. The file will automatically be named with the information about pressure, area, and time. This data is NOT included anywhere else in the file and must be recorded if one wishes to rename the photo.
- Video can be recorded by first checking the Pressure and Area boxes under the Annotate section. The file name and destination must be set BEFORE beginning to record the video. If this location/name is not specified the file will be corrupted and not be usable for analysis. FPS is typically set to 5 for current operation, higher FPS is possible but requires a better USB port. Use Fixed FPS for a real time video, using Only Updated Frames generates a time lapse of the experiment based on the frame rate selected.
Generally a video is recorded to monitor all portions of the experiment. One can then play back the video and take screenshots from the video (using Windows screenshot tool Win + Shift + S).
Experiment Workflow
Begin a polymerization according to the instructions here. Omit instructions involving a top-down transfer. Top-down transfers cannot be performed with our current configuration of the BAM due to space limitations. Bottom-up transfers can still be performed.
Before adding water to the trough in step 5, add the black wedge over the top of the well so that it is in line with the path of the laser beam. Place the wedge glossy face up, angled away from the opening of the trough.
Using the motors, adjust the camera so that the image is as desired for the experiment.
Begin recording the polymerization before the barrier begin closing. Check back on the progress periodically to ensure that things are working well and that the image is in focus.
If desired, once the polymerization is completed, disturb the platform that the container is placed on to break apart the polymer into rigid sheets.